Sharing a mobile connection with a Micromax A119 Canvas XL

How to share internet connection on a Micromax A119 Canvas XL
There are situations in which we do not have a Wi-Fi connection, either because we are away from home, outside of work, experiencing a network problem, or staying in a second residence. In such cases, we may need to connect from a computer/laptop, tablet, or television to watch our favorite series or movies using the internet connection of our Micromax A119 Canvas XL.
Fortunately, if you have a SIM card with mobile data on your Micromax A119 Canvas XL you can create a Wi-Fi hotspot or tethering via Bluetooth or USB and surf the internet from another device by following the steps below:
Table of Contents:
- First method
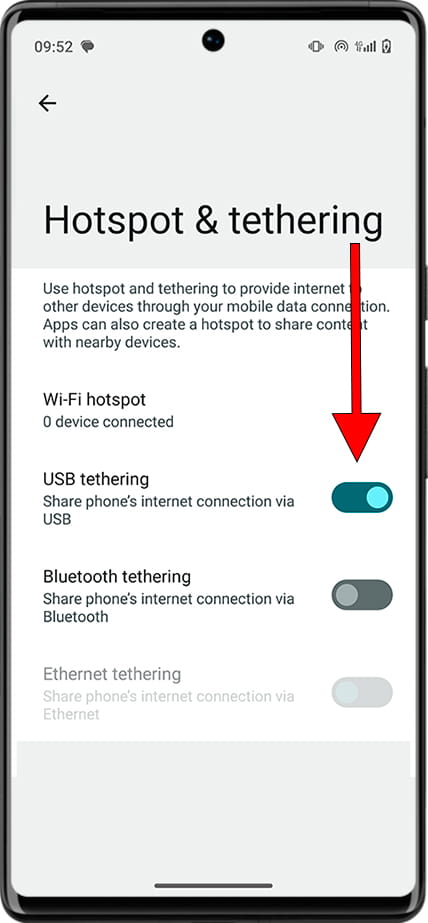
- Share internet via USB on A119 Canvas XL
- Video instructions
- User questions and problems
Estimated time: 10 minutes.
1- First step:
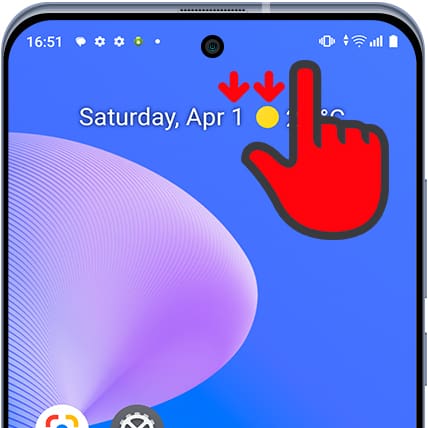
First of all check that you have 3G / 4G / 5G mobile connectivity activated on your Micromax A119 Canvas XL. To do this, with the Micromax A119 Canvas XL unlocked, you can slide your finger from the top of the screen downwards, the shortcuts to device settings will be displayed.
2- Second step:
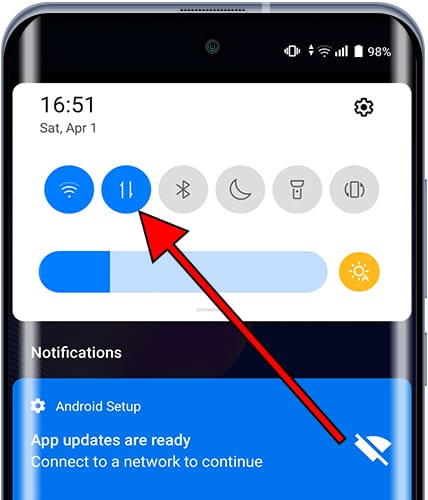
The icon for the internet connection via 3G/4G/5G data connection must be activated and appear in blue or green, if it is not activated, click to activate it.
If you can't find the icon shown in the image, swipe down again to display all the quick setting icons.
If you don't see the data connection icon on your Micromax A119 Canvas XL, check out the following tutorial: Edit the shortcuts panel on Android.
3- Third step:
On your Micromax A119 Canvas XL go to the device settings, it is the gear wheel icon that you will find on the home screen or in the phone menu, you can access the main menu by dragging your finger from the bottom to the top of the screen.
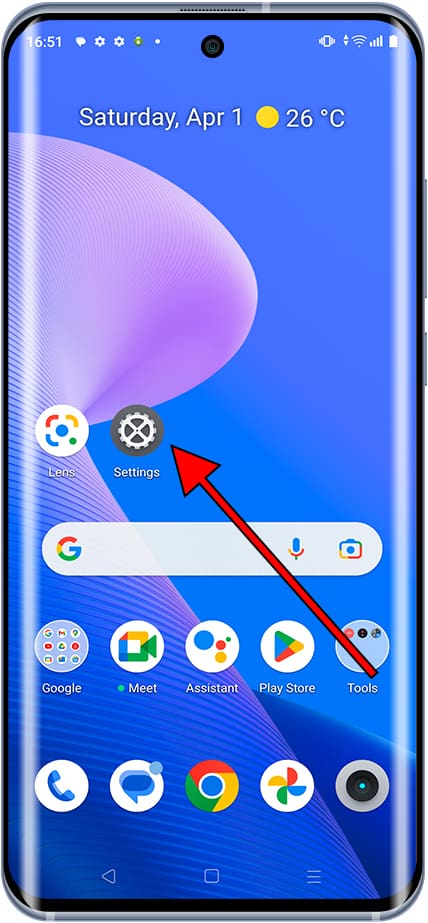
4- Fourth step:
Click on “Networks & internet” or “Connections” and then click on “More”.
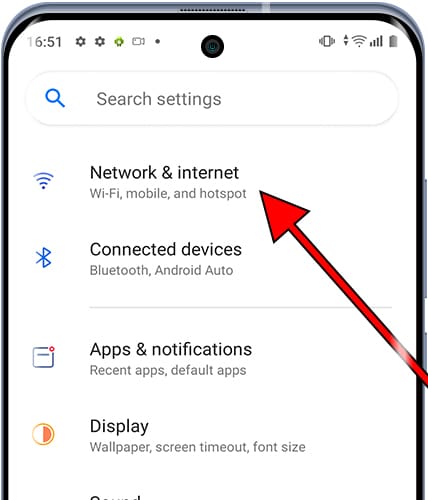
5- Fifth step:
Click on “Hotspot & tethering”.
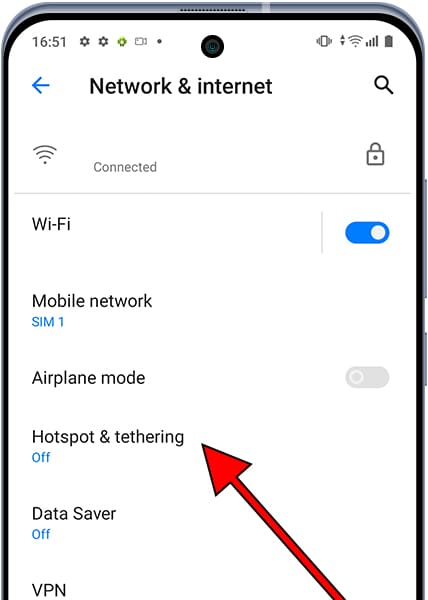
6- Sixth step:
Once inside the "Hotspot & tethering" section of the Micromax A119 Canvas XL, click on the "Wi-Fi hotspot" section to configure the shared connection by creating a Wi-Fi network to which other devices can connect.
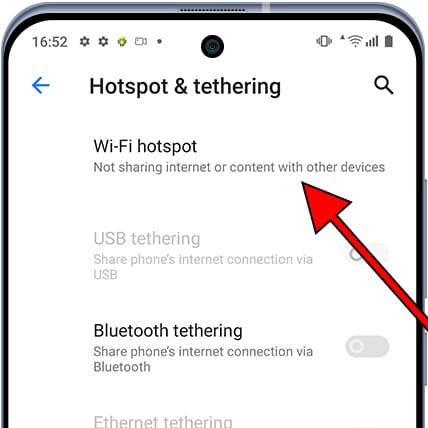
7- Seventh step:
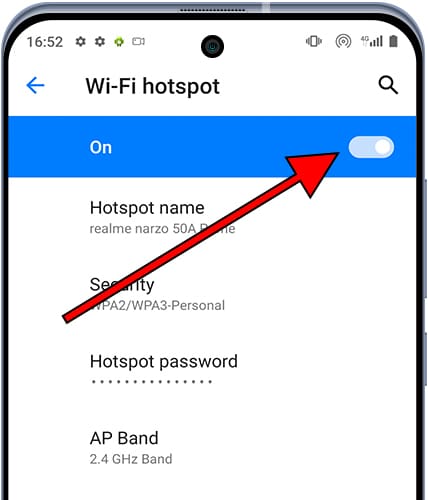
Press the button shown in the following image to activate the Wi-Fi access point on your Micromax, if it already appears activated you can go to the next point.
8- Eighth step:
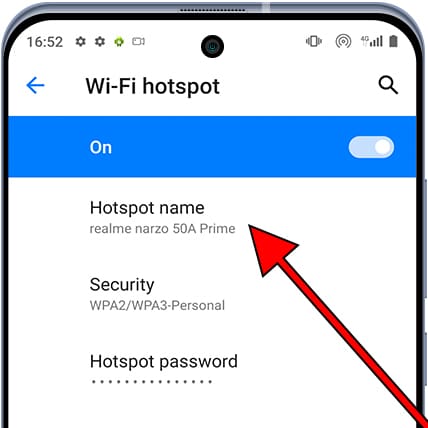
The name of the Wi-Fi network created using the data connection of the Micromax A119 Canvas XL will appear under the "Hotspot name" section, this is the Wi-Fi network that you must search for and use on the other device from which you want to connect. If you want to change the name of the network you can do it by clicking and editing the name.
9- Ninth step:
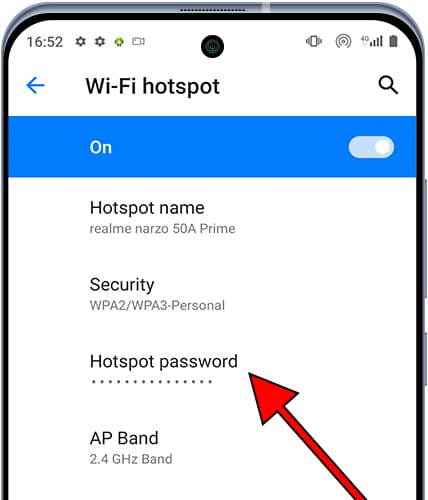
The password of the Wi-Fi network or access point created from the Micromax A119 Canvas XL can be found in the "Hotspot password" section.
Click on the dots or asterisks to check the password and modify it if you want to change it to a simpler or more complex one.
10- Tenth step
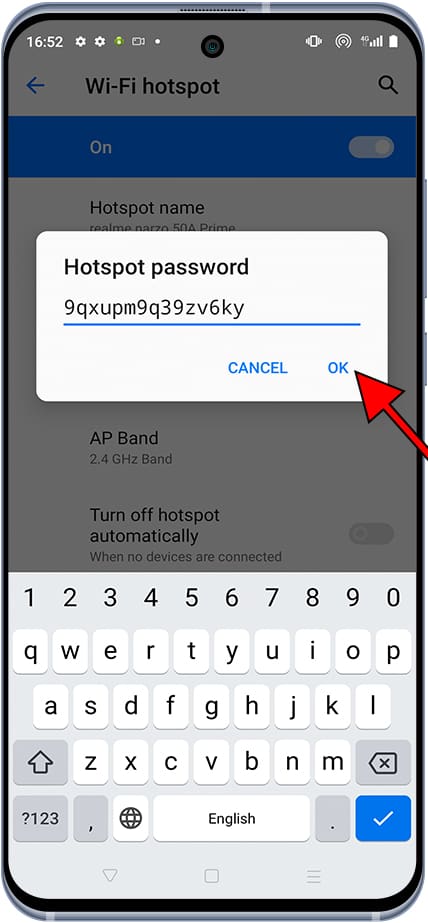
Check or change the password and click on "OK" to continue.
11- Step eleven
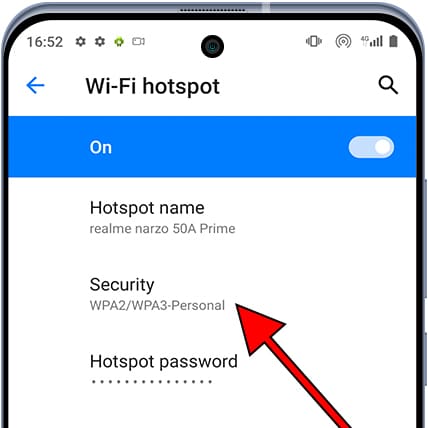
If you want to change the security settings of the Wi-Fi access point, click on the "Security" section.
12- Step twelve
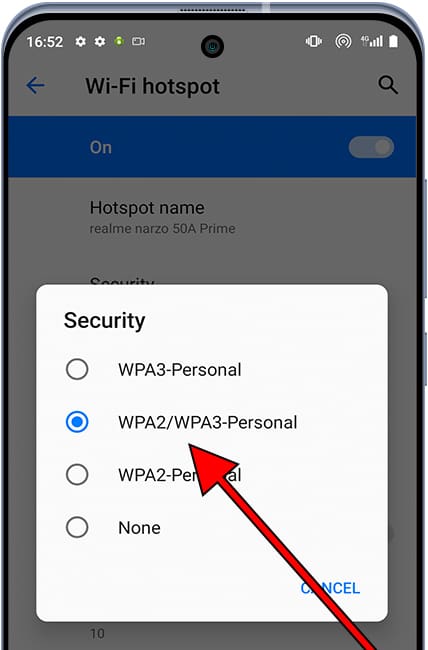
Select the type of connection security from the options available on your Micromax, "WPA3-Personal" is the most recent security protocol but you must adjust it depending on whether the device you want to connect via Wi-Fi accepts such a recent protocol or an older one.
13- Step thirteen
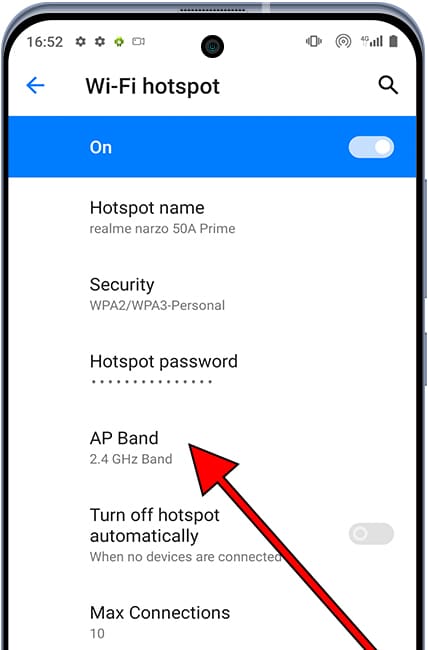
If you want to change the access point band of the access point created with your Micromax, click on “AP Band”.
14- Step fourteen
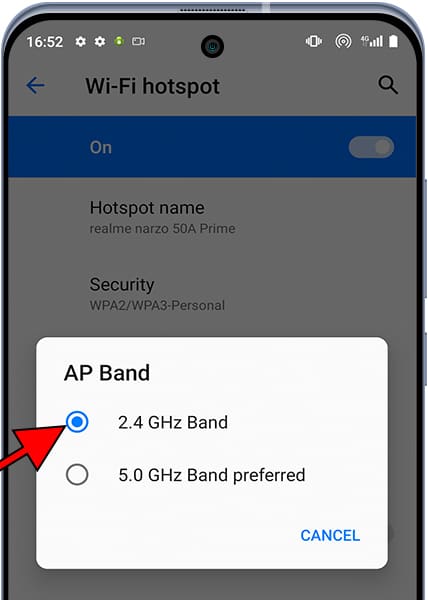
You can choose between the 2.4 Ghz or 5 Ghz band, it is possible that your device shows other options, this will depend on the software version or the region of your Micromax A119 Canvas XL.
The 5 Ghz band is usually less saturated and offers a better connection for short distances and the 2.4 Ghz band, despite being more saturated, since other Wi-Fi networks are usually configured in this band, it is better to connect long distance.
Click on “Save” and you can search and configure this portable Wi-Fi network to share the internet connection from your Micromax A119 Canvas XL on another device.
