Scan documents with Lenovo Tab M10 FHD Plus LTE
Scan document on a Lenovo Tab M10 FHD Plus LTE
In devices with the Android operating system like the Lenovo Tab M10 FHD Plus LTE there is still no built-in functionality in the operating system itself to scan documents but luckily Google has a solution for this problem.
Your Tab M10 FHD Plus LTE comes from the factory with the suite of Google applications, including Google Drive, if you don't have it installed you must download it from the Google Play Store and you will be able to scan documents as if it were a regular copier or table scanner only with the camera of your smartphone.
Estimated time: 2 minutes.
1- First step:
To start, locate the Google Drive application on your Lenovo Tab M10 FHD Plus LTE, if you have never used it should appear on the main screen or in the applications menu. On the home screen it may appear in a folder called “Google”, if you can't find it you can search for it and download it from the Play Store.
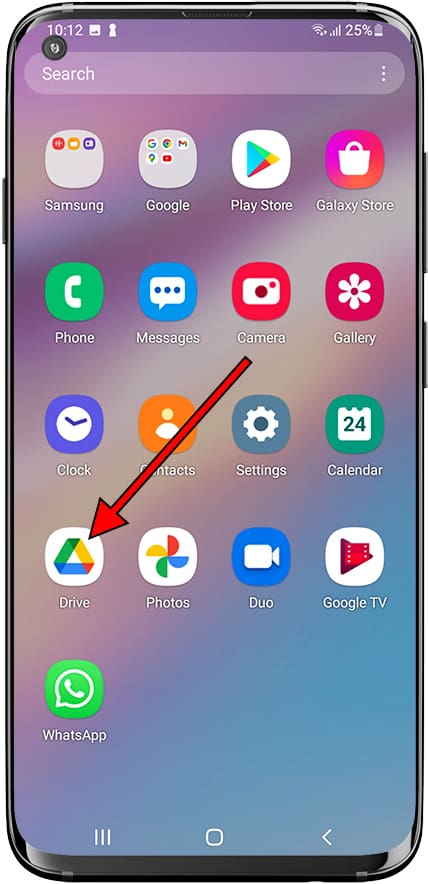
2- Second step:
Once Google Drive is open, if it is the first time, it will ask you to sign in with your Google account. You can use the Google account that you use on your Lenovo Tab M10 FHD Plus LTE. Press the “+” button that you will see at the bottom right of the screen.
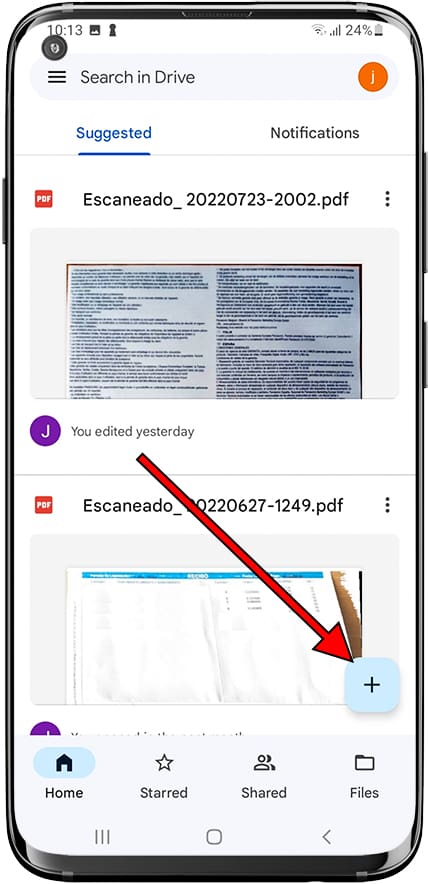
3- Third step:
A menu will appear from the bottom of the screen, among the available options you will see “Scan”. Tap to start scanning documents from your Tab M10 FHD Plus LTE.
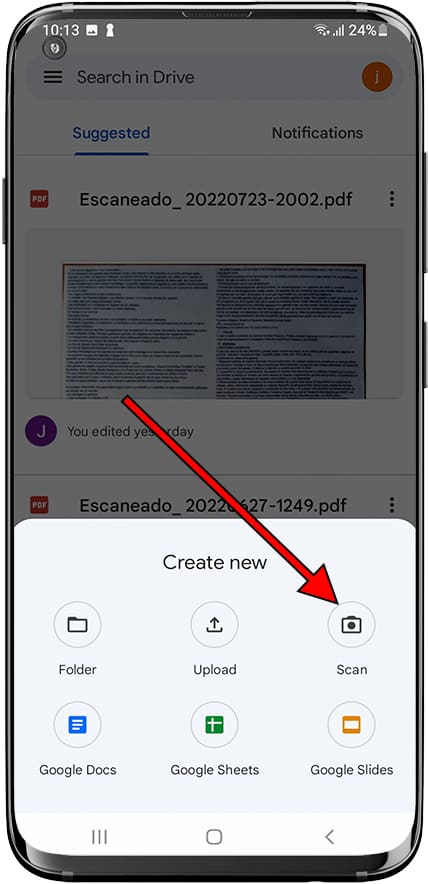
4- Fourth step:
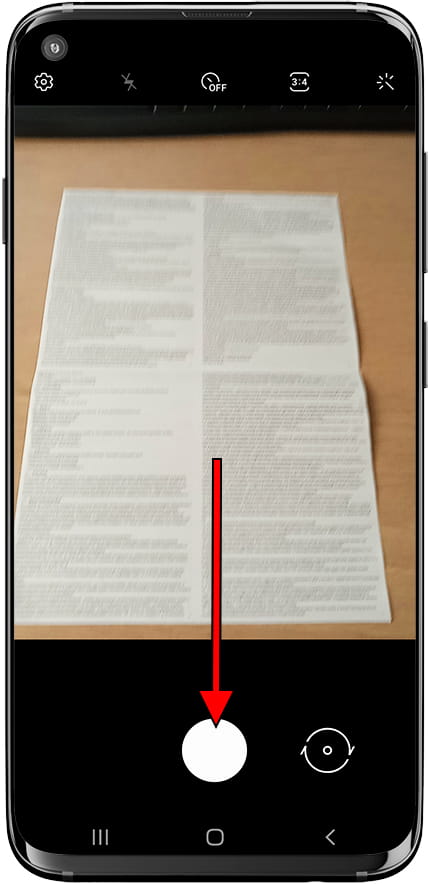
Using the camera of the Lenovo Tab M10 FHD Plus LTE, focus and try to make the document fit in the central part of the screen and be seen correctly. When you're ready, click on the capture button on the camera.
5- Fifth step:
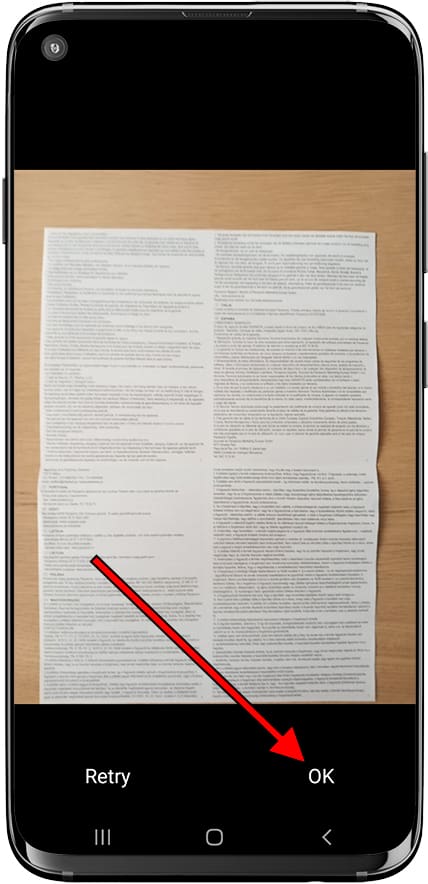
Check the captured image, check that the image is defined and the text can be read, if it is correct click on “Accept”, otherwise you can try again by clicking “Retry”.
6- Sixth step:
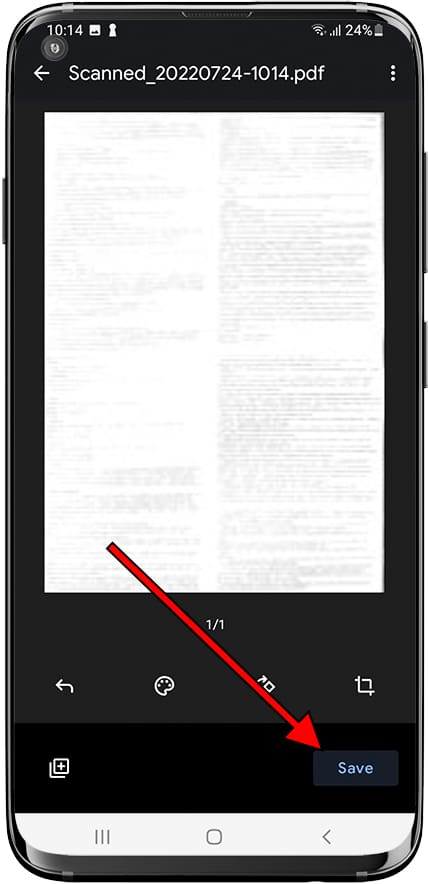
You will be able to rotate or flip, crop, retouch the colors or add more images to the document capture to be able to include them in the same PDF through the icons that appear at the bottom of the screen. If everything is correct, click “Save” to continue.
7- Seventh step:
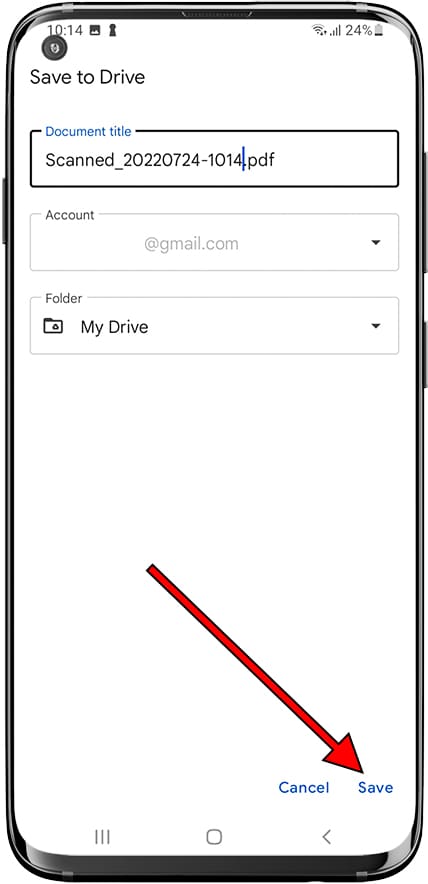
In the next step you can choose the name with which you want the PDF document to be saved and in which Google account and in which folder you want it to be stored. Once you have completed all these settings, click on “Save” at the bottom right of the screen of your Lenovo Tab M10 FHD Plus LTE.
8- Eighth step:
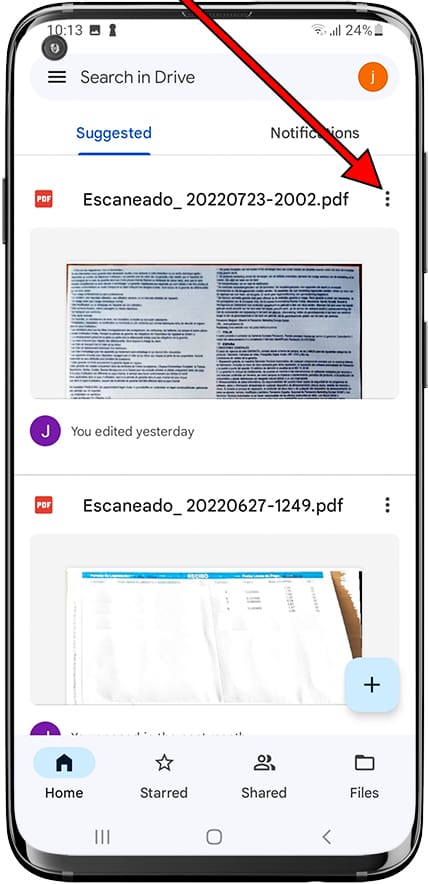
Your document is already scanned and saved as a PDF in your Google Drive account and in the internal storage of the Lenovo Tab M10 FHD Plus LTE. You can locate it using the search engine that appears at the top or by browsing through the folders. If what you need is to send it through a messaging application or email, once the file is located, click on the three vertical dots that appear on its right side.
9- Ninth step:
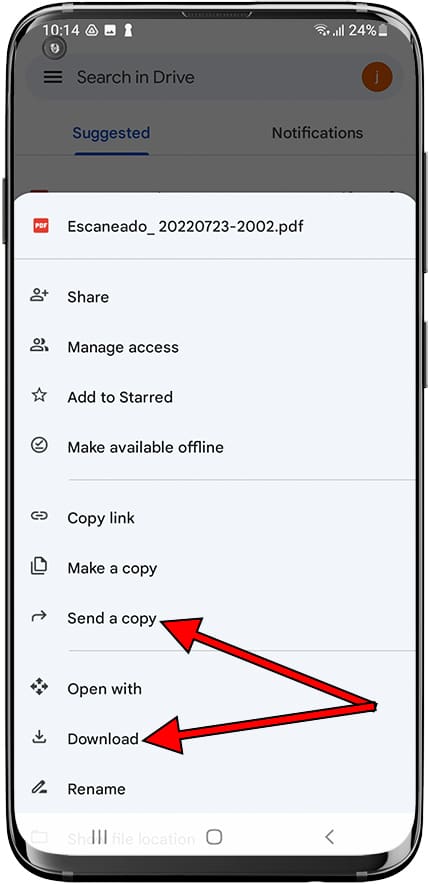
A menu of options for this document will be displayed, you can share it directly with other Google Drive users or send a copy, to send it by messaging or email use the “Send a copy” option.
10- Tenth step
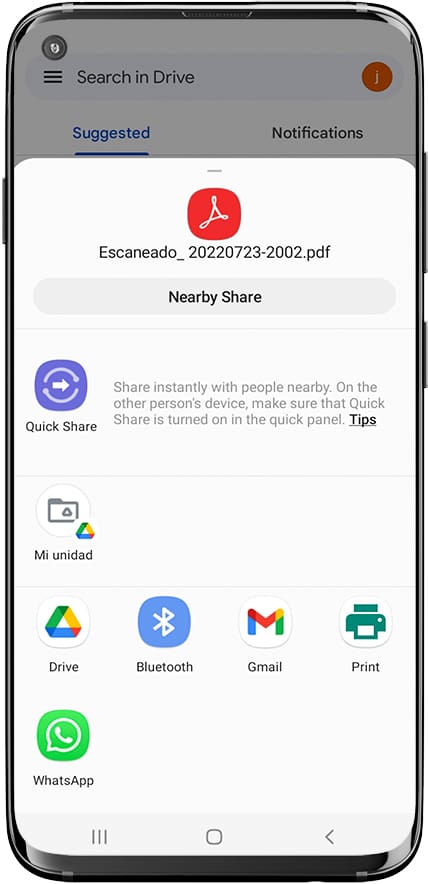
By clicking on "Send a copy" the operating system options menu will appear to send or share files, select WhatsApp, Telegram, Gmail, Bluetooth or any of the applications that appear available to share the scanned document.
