Scan documents with Apple iPhone 12

Scan document on an Apple iPhone 12
Apple brand mobile devices such as the Apple iPhone 12 have a very useful functionality incorporated within one of the pre-installed applications along with the operating system, that is, you do not need to download or install a new application to be able to scan documents, invoices, tickets, etc.
Only with the camera of your Apple iPhone 12 will you be able to scan documents as if it were a regular copier or table scanner, the Apple iPhone 12 will automatically adjust the image so that it is framed and can be read correctly.
Estimated time: 2 minutes.
1- First step:
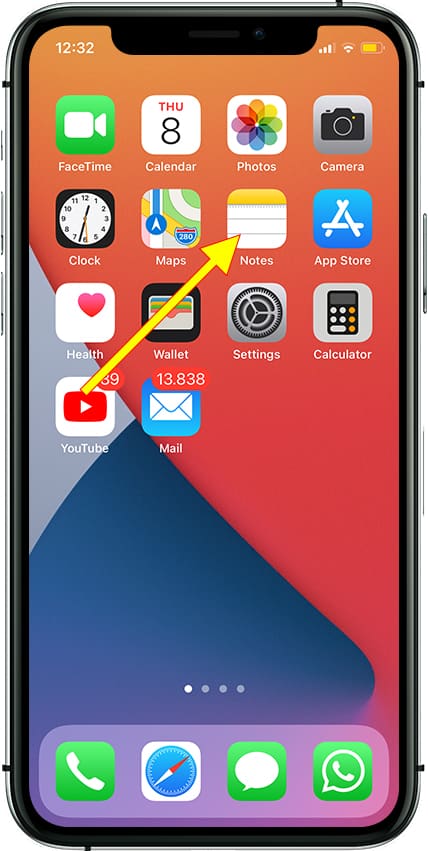
To begin, locate the Notes application of your Apple iPhone 12, if you have never used it should appear on the main screen, it is the application with the icon of a white notepad with a yellow upper part. Tap to open it.
2- Second step:
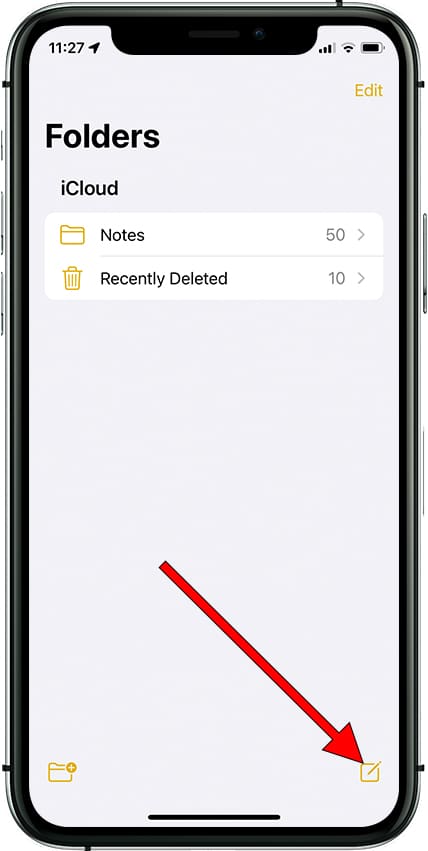
If this is the first time you use this application on your Apple iPhone 12, a welcome screen will appear, press start or continue. In the lower right corner you will see the icon to create a new note, it is a square with a pencil, press to continue.
3- Third step:
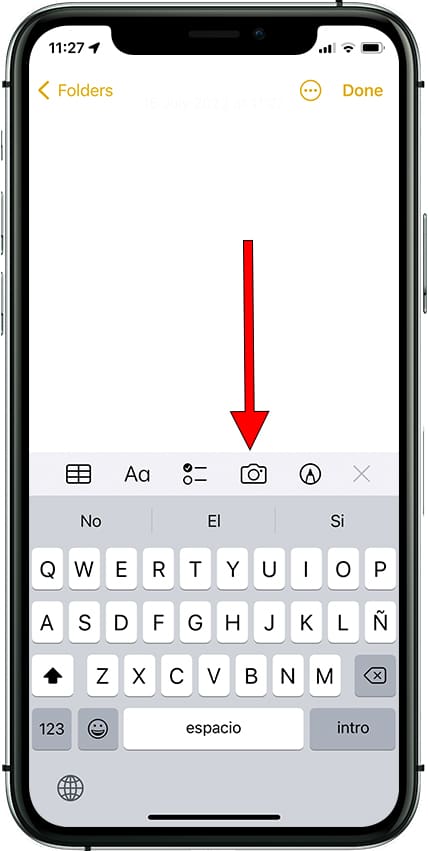
When opening the new note, the keyboard and a list of icons will appear at the top, you can add photos taken with the Apple iPhone 12 camera and scan documents, to do this click on the icon of a photo camera.
4- Fourth step:
By clicking on the photo camera icon, a list of options will be displayed, among which you will find the option to add a photo or video from the gallery, take a photo or video with the cameras available on your Apple iPhone 12, scan documents ( which is the option you are going to use) and scan text. Click on “Scan documents”.
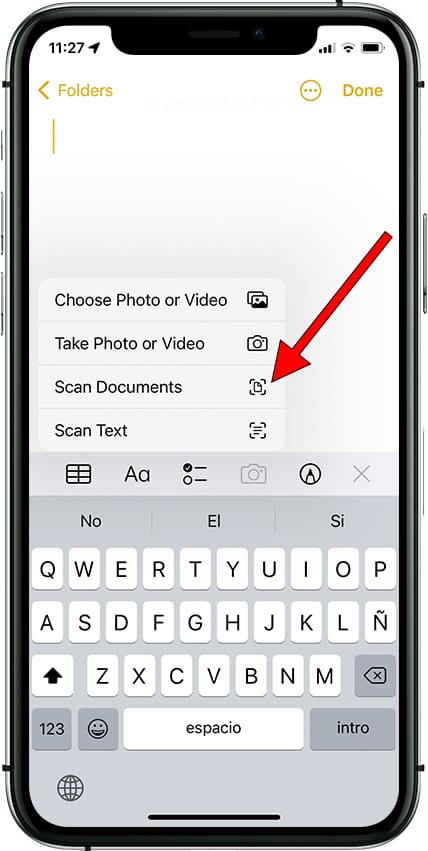
5- Fifth step:
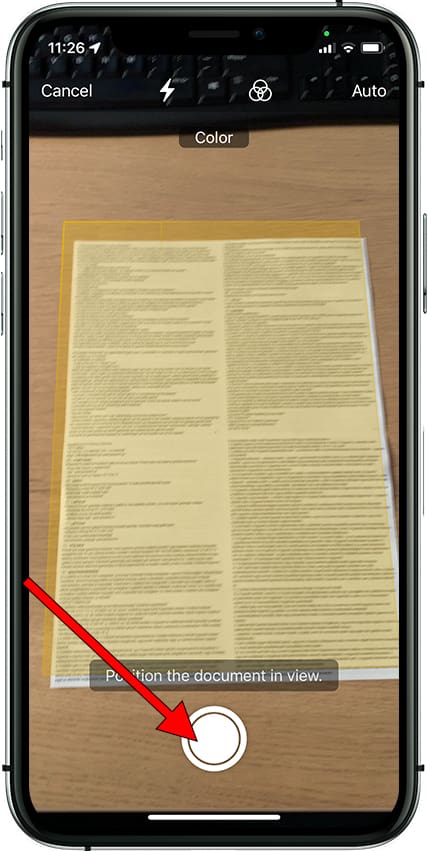
Point the Apple iPhone 12 camera at the document you want to scan, you will see that when the Apple iPhone 12 detects a page or paper that looks like a document to be scanned, a yellow layer appears defining the area to be scanned. Press the capture button on the camera to confirm that the area to be scanned is correct.
6- Sixth step:
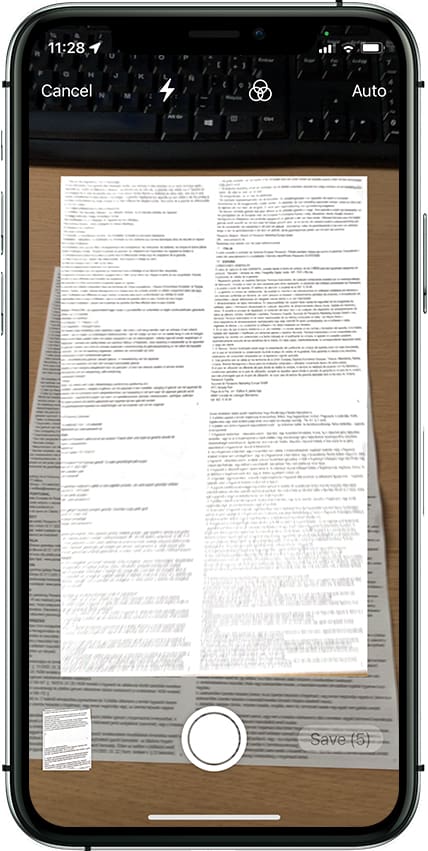
You can continue scanning multiple documents by simply changing the document and pressing the capture button again as you did before.
7- Seventh step:
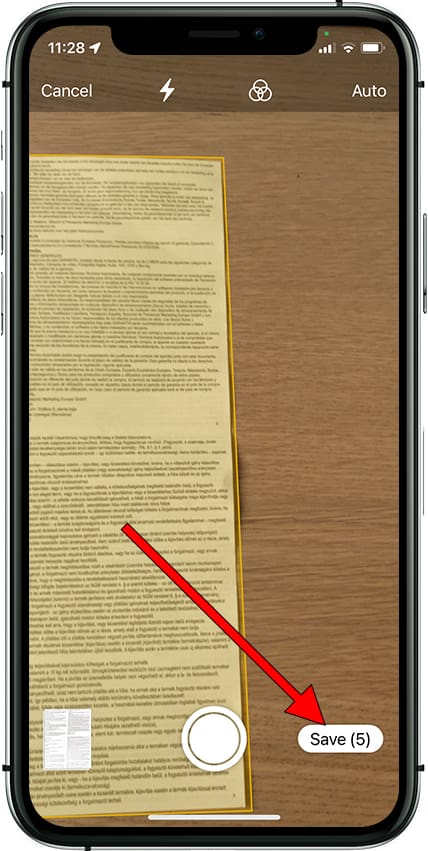
Once you have finished scanning all the documents with your Apple iPhone 12, click on the “Save” button that appears at the bottom right of the screen.
8- Eighth step:
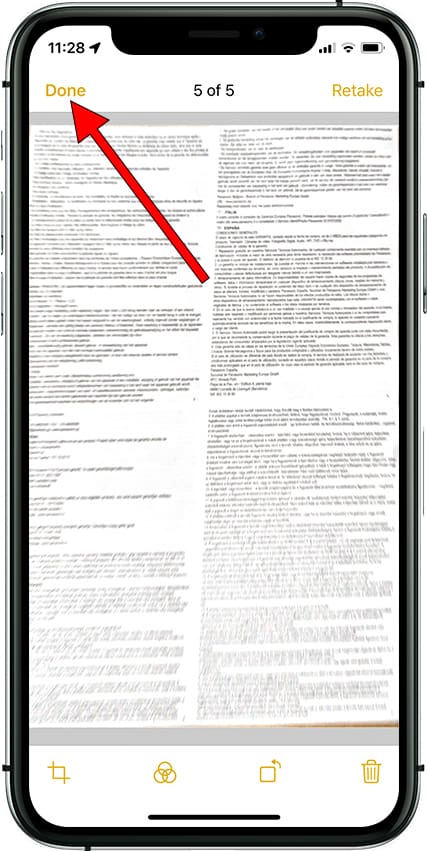
You can then check the scanned documents, crop them, flip the image, change colors or delete and repeat. If everything is correct, click on “Done” at the top left of the screen.
9- Ninth step:
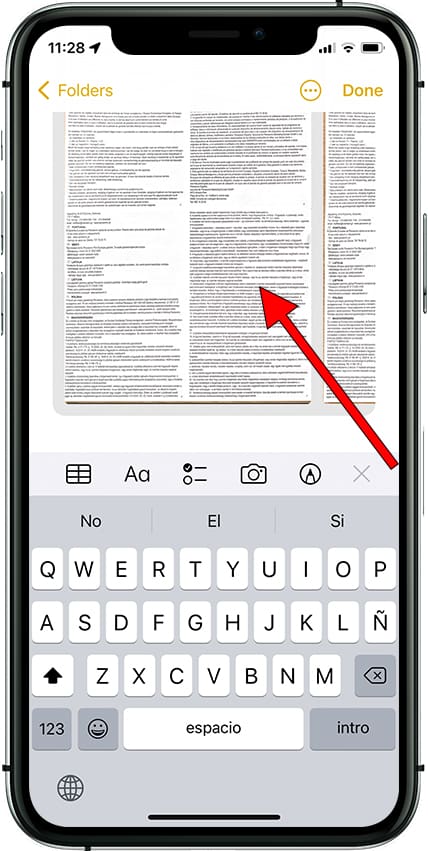
The scanned documents will appear embedded in the new note, click on the image to open it. If you want to save the note with the attached document, click on “Done” at the top right of the screen.
10- Tenth step
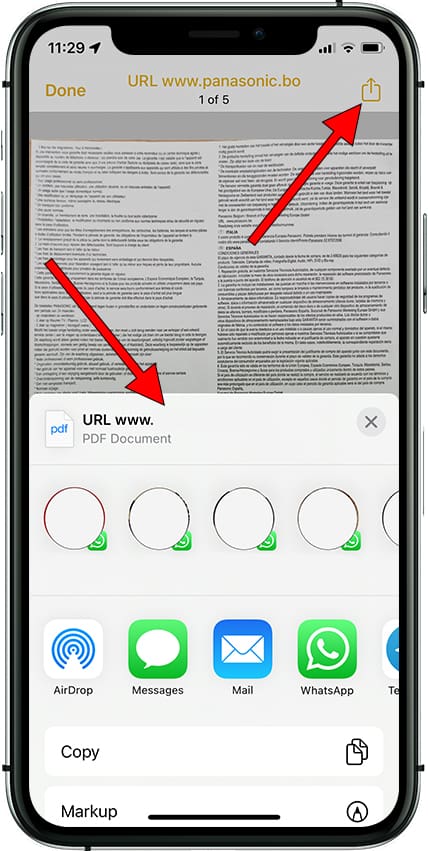
When you open the scanned document or documents you can export it, move it to a folder or share it by pressing the share icon, it is the icon of a square with an upward arrow that appears in the upper right part of the screen of your Apple iPhone 12.
A menu will appear from the bottom of the screen with the different options to share the PDF document, you can send it by WhatsApp, iMessage, AirDrop, mail, etc. You can also copy it to paste it in any other app or upload it to the cloud using Google Drive, iCloud or any other cloud storage app you have installed on your iPhone 12.
