Delete language to a TruConnect X401A
How to delete a language from TruConnect X401A?
If you have several languages installed on your TruConnect X401A and you want to delete one or more of them to free up space in its internal memory of we indicate how to remove languages from TruConnect X401A following the next tutorial.
At some point you may want to delete a language that you no longer need or find unnecessary, which is especially useful if you want to free up storage space or simplify your X401A settings.
In this tutorial, we will guide you through the steps necessary to remove a language from your X401A. Whether you've accidentally set a language you don't need or simply want to optimize the language list on your device, you'll learn how to do it quickly and easily.
If instead you are looking to change the language of your TruConnect X401A click the following link: Change language TruConnect X401A
Estimated time: 5 minutes.
1- First step:
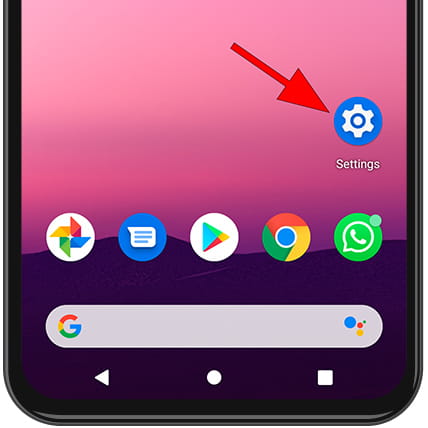
First, go to the settings of the TruConnect X401A, it is the icon of the cogwheel, it must be on the home screen or in the menu of the phone, you can access the main menu usually by dragging your finger from the bottom to the top of the screen.
2- Second step:
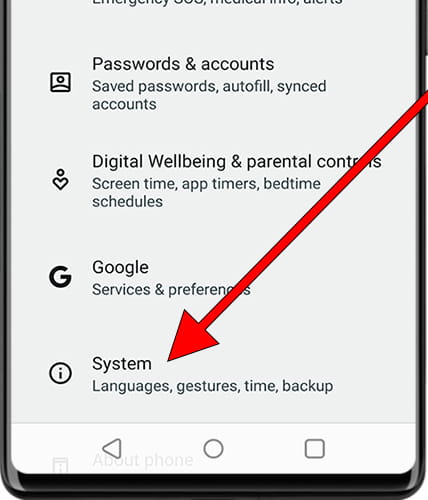
Look for the System section, usually the icon of the exclamation mark symbol that is in the lower part of the screen.
3- Third step:
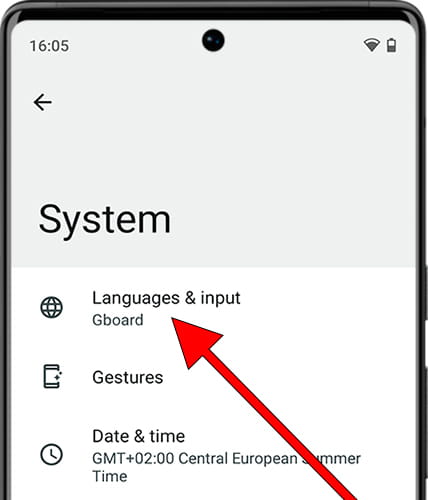
Click on “Languages & input” it is the world globe icon. From this section you can change the language of the texts displayed on the TruConnect X401A and also the keyboard language.
4- Fourth step:
Click again on “Languages”, this is the first option at the top of the TruConnect X401A, screen, usually with Chinese characters.
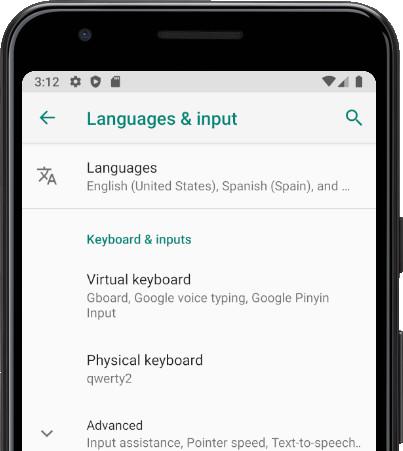
5- Fifth step:
The list of languages that are installed on your TruConnect X401A, will appear, click on the three points in the upper right of the screen.
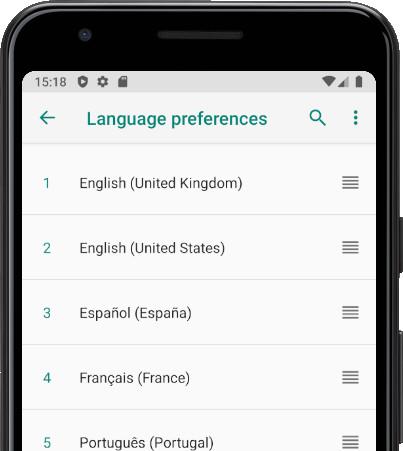
6- Sixth step:
Press “Remove”, an unchecked box will appear to the left of each language. Click on the box to mark those languages that you want to eliminate from your TruConnect X401A, leaving the language that you want to keep unchecked.
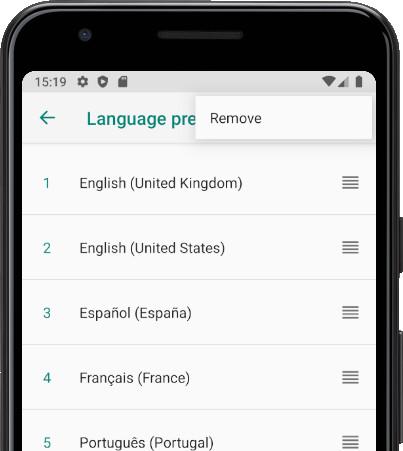
7- Seventh step:
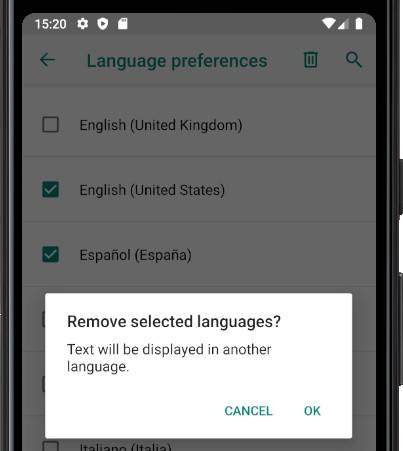
Click on the trash can icon at the top right of the screen to delete these languages.
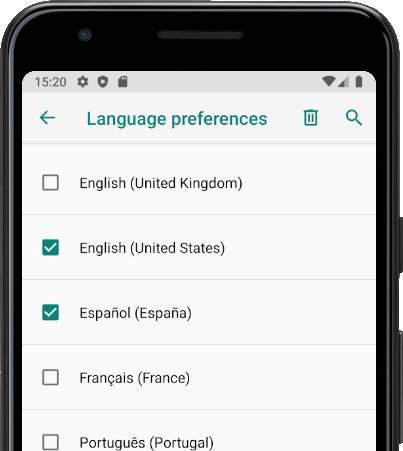
8- Eighth step:
You will see a confirmation message to verify that you did not perform that action by mistake, press “OK” to confirm the deletion and you will have already deleted that language from the TruConnect X401A.
