Record screen on Meta Quest Pro

How to record the screen on a Meta Quest Pro
Recording the screen of your Virtual reality glasses Meta Quest Pro in a video with sound can be very useful to perform a tutorial or show an acquaintance how to perform certain tasks in a Meta Quest Pro, save in a video file and then send it or upload it to a platform like YouTube or social networks.
Sometimes you would like to record video with sound of a video game, an immersive experience or 360 video.
If, on the contrary, what you want is to take a screenshot of your Meta Quest Pro in a still image instead of video, click on the following link and follow the indicated steps: capture screen on Meta Quest Pro.
To make this recording in your Meta Quest Pro follow these steps:
Table of Contents:
Estimated time: 5 minutes.
1- First step:
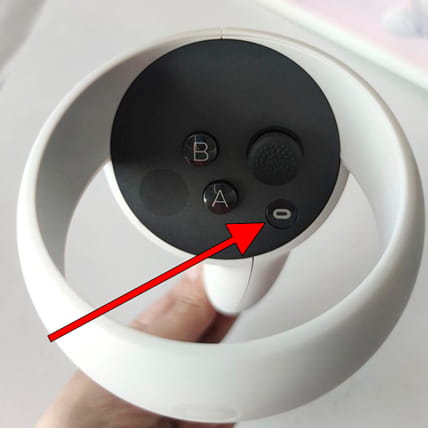
Locate the "Oculus" button on your right-hand controller, it's the flat button on the bottom right of the controller with the "O" for Oculus symbol.
Tap to open the Oculus main menu.
2- Second step:
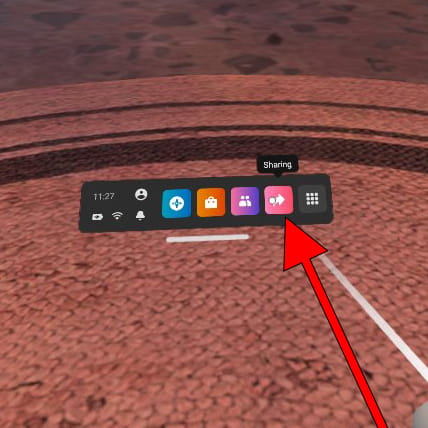
In the lower menu that appears on the screen, look for the share button icon, it is a pink icon with an arrow to the right. In the latest updates it has been changed to a camera icon.
Press on the icon using the trigger of any of the two controllers.
3- Third step:
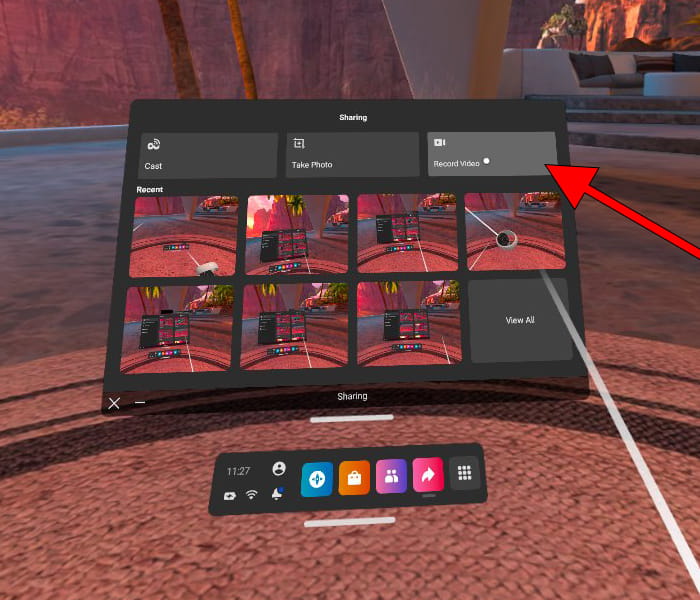
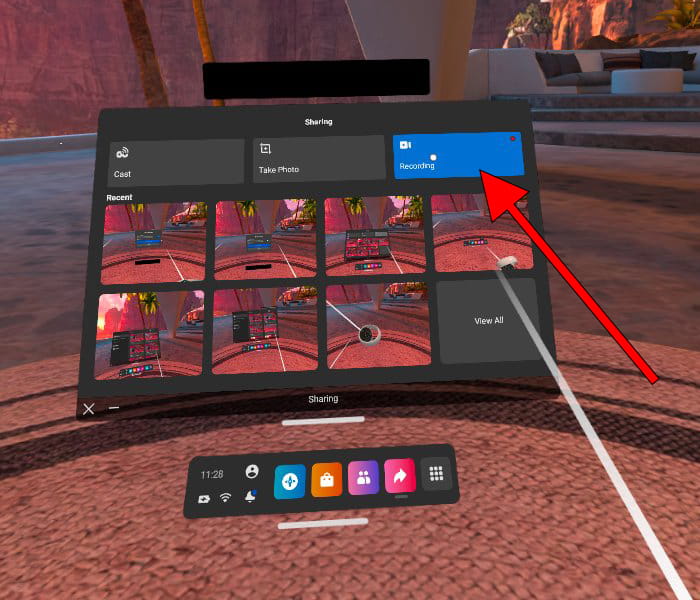
The "Sharing" window will appear where you can see all the screenshots and videos recorded with your Meta Quest Pro, in the upper right part of the window there will be a button with a camcorder icon and the text "Record video". Click on this icon to continue.
4- Fourth step:
A window will appear in which you can choose if you also want to record the sound of the Meta Quest Pro microphone, mark this option if you want to record the sound of the microphone to record your voice at the same time as the sound of the content.
Click on "Start recording" to start the video recording.

5- Fifth step:
During the video recording you will see a yellow dot always visible on the screen that indicates that all the visible content and the sound of the microphone are being recorded.
To stop the video recording of the screen, follow the previous steps again and once inside the sharing window, click on the button that appears in blue and the text "Recording".
6- Sixth step:
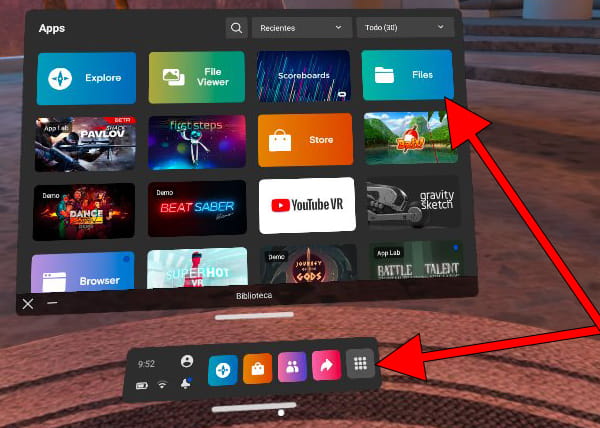
To view all of your Meta Quest Pro screenshots, press the Oculus button on the right controller to open the main menu. Click on the application icon and look for the "Files" application, press the trigger of the controller to open this application.
7- Seventh step:
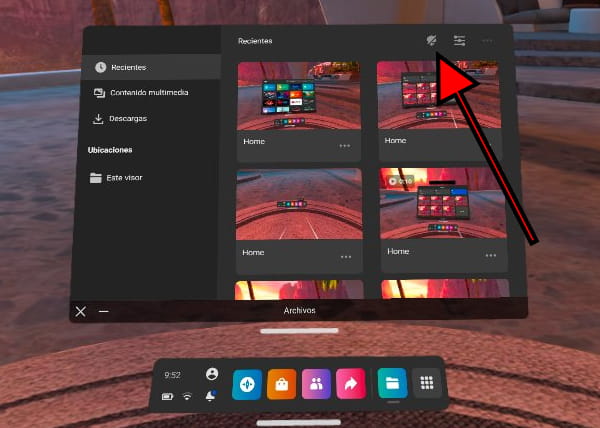
Once inside the "Files" application you will be able to see all the screenshots and video recordings made on your Meta Quest Pro.
You can share the videos directly from the virtual reality glasses, however, the options are limited to the Meta social networks.
Tap the cloud sync icon at the top of the app to be able to watch videos directly from your mobile phone through the Oculus app.
Record screen during a game
To record the screen of your Meta Quest Pro while playing a video game or using an application, you must press and hold the “O” or “M” button (depending on the version of your controller) on the right controller and at the same time press and hold the trigger of the same command.
To stop recording, simply release the trigger and button and the screen recording will be saved in the gallery.

In your Quest Pro you can store the screen recordings in video thanks to its internal 256 GB memory.
You will be able to see the video of the screen recording in the photo gallery of your Meta Quest Pro.


