Guided access on Apple iPod touch 6th generation
How to pin the screen on an Apple iPod touch 6th generation?
There are times when you need someone else to use your Apple iPod touch 6th generation either to see a photo, a video, use an application or visit a web page, but you do not want them to be able to access the rest of the applications and data on your device either by privacy, security or to avoid mistakes.
For example, there are times when you need to give the Apple iPod touch 6th generation to a friend, family member or even a small child and you do not want them to leave that app that you have opened. This is very useful, for example, so that young children can watch videos on YouTube without leaving the application and you can even prevent them from doing anything other than watching, that is, blocking the touch panel until you want.
Imagine that you want to let someone see a photo or video from Instagram but you don't want them to be able to “like” that publication or see the rest of the publications and “gossip”, since it is possible to do so on your iPod touch 6th generation it is already incorporated in the Apple operating system for a long time, follow the steps below and we will tell you how to configure it.
Estimated time: 2 minutes.
1- First step:
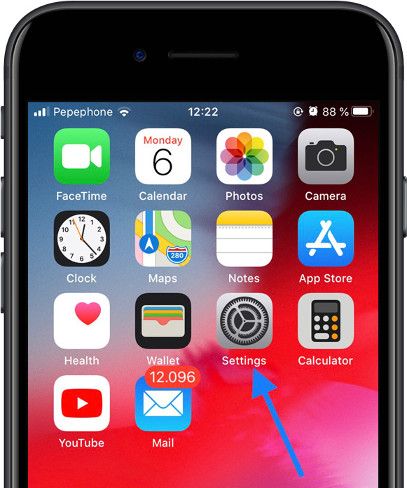
To begin, you must activate “Guided access” or check if you have it activated. Open the Apple iPod touch 6th generation settings, it is the cogwheel icon that you will find on the home screen.

2- Second step:
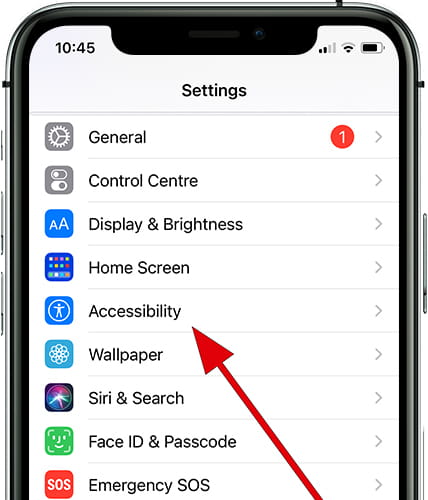
Go down through the settings of the Apple iPod touch 6th generation until you find the section called “Accessibility”, it is the blue icon that contains the symbol of a person within a white circle. Click to access.

3- Third step:
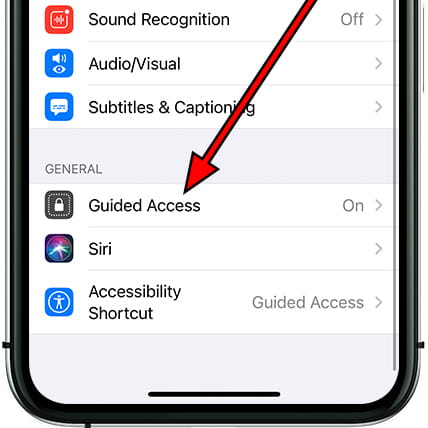
There are many accessibility settings for the Apple iPod touch 6th generation, go down until you find the “Guided Access” section. This is the name chosen by Apple to pin an application on your iPod touch 6th generation and allow someone else to use the device without leaving the application.

4- Fourth step:
Click on “Guided Access” to activate this accessibility or security feature.

5- Fifth step:
Click on “Code settings” if you want to define a different code to the one used to unlock your Apple iPod touch 6th generation, use your fingerprint or your FaceID to end the guided access.

6- Sixth step:
Click on “Time limits” if you want a sound or a voice to play indicating the time remaining with the guided access on your Apple iPod touch 6th generation.

7- Seventh step:
Click on “Automatic lock” to define a different time than usual to lock the Apple iPod touch 6th generation when it is not being used during the guided access.

8- Eighth step:
You have already configured the guided access in the Apple iPod touch 6th generation, you can now open the application that you want to use during the guided access to lend the iPod touch 6th generation to someone else and that they cannot leave or gossip on your Apple iPod touch 6th generation. In this example we are going to use the Safari web browser.
9- Ninth step:
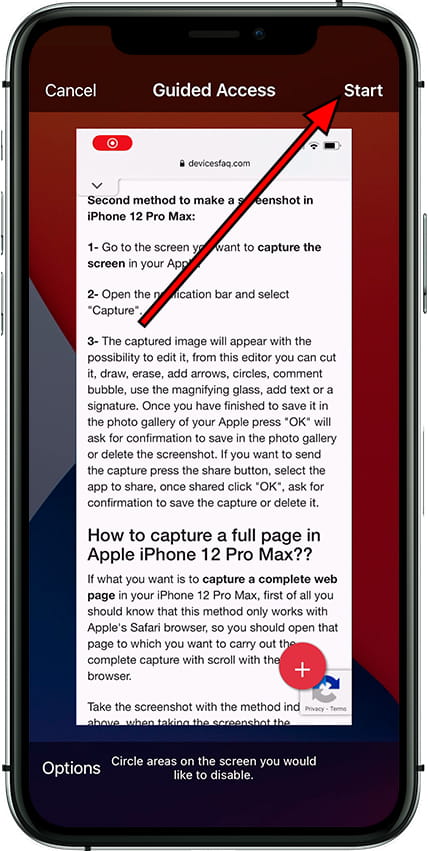
In the lower left you have the “Options” button from which you can define more very interesting settings such as deactivating the side button, deactivating the volume buttons (very interesting for example to leave the Apple iPod touch 6th generation to a child), deactivating the movement, disable keyboards, touchpad, dictionary lookup and activate a time limit. Press “OK” to continue.

10- Tenth step
In the upper right part of the Apple iPod touch 6th generation you have the “Start” button, press to start the guided access and you can now leave the device to another person with the assurance that they will not be able to exit that application and if you have deactivated the touch panel You will not be able to go through photos for example or touch anything else in that application that you have started.

11- Step eleven
To end the guided access session on your Apple iPod touch 6th generation you must press the power and lock button three times in a row. Guided access options will appear again, click on “Finish” to return to normal mode and deactivate “Guided access”.

With these simple steps you have learned to activate and use the “Guided Access” in your Apple iPod touch 6th generation, once configured you can use it at any time by pressing the button indicated in step eight three times.


