Manage notifications on HTC One A9
Turn notifications on or off on HTC One A9
The notifications sent by applications or the operating system of the HTC One A9 are undoubtedly very useful, but they can be annoying if abused.
Sometimes it happens that, when installing a new application, we accept all the permissions and do not realize it, and after a few days we have been inundated with notifications, often unnecessary and which only attempt to capture our attention without providing us with any real benefit.
Or it may happen that by mistake we have disabled or blocked notifications for an application and we want them to appear again on our One A9.
Whatever your situation, in the following steps we will tell you how to manage notifications from the One A9 settings, step by step and with images so you can do it without problems.
Table of Contents:
Estimated time: 5 minutes.
This guide has a total of 8 steps.
1- First step:
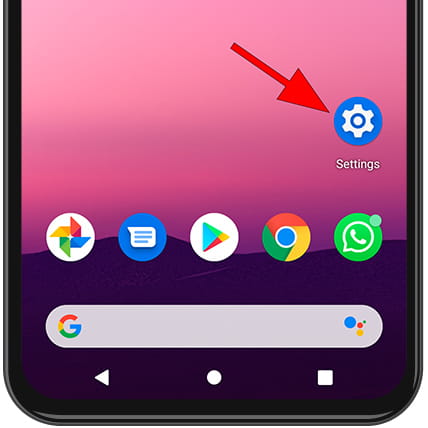
Open the HTC One A9 settings, this is the gear icon that should appear on the device's home screen. If you don't find it there, from the home screen slide your finger up from the bottom of the screen to open the list of applications, there you will find the system search engine, type "Settings".
2- Second step:
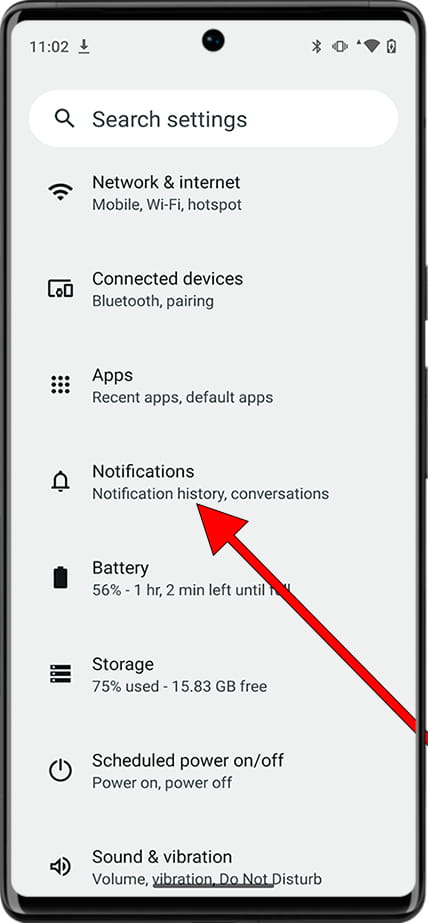
Scroll down a bit through the HTC One A9 settings until you find the "Notifications" section, press to access the notification settings.
3- Third step:
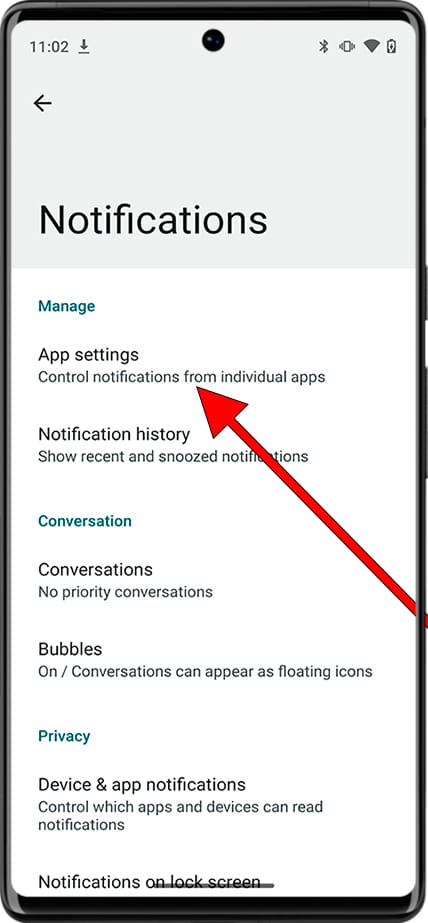
The first section that will appear is "App settings", click on this section to configure notifications for each application. Here you can also find the notification history where you can find recent and snoozed notifications.
4- Fourth step:
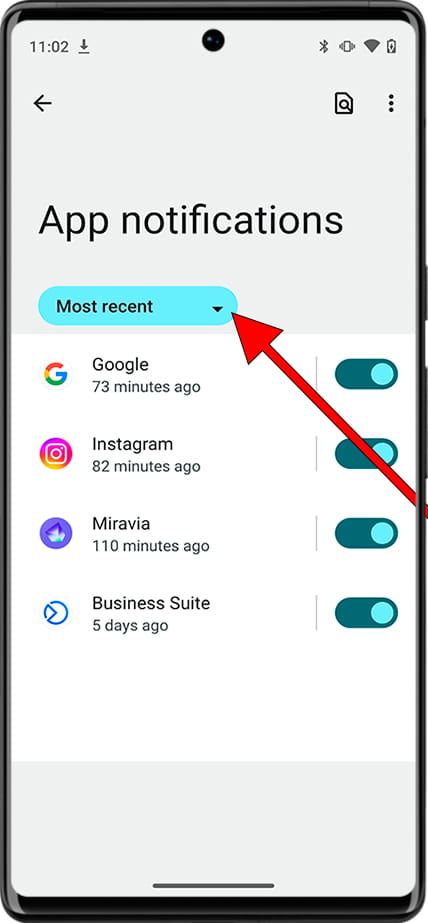
A list of the applications that have recently sent a notification will appear. To see the complete list of applications installed on the HTC One A9, click on the "Most recent" drop-down menu.
5- Fifth step:
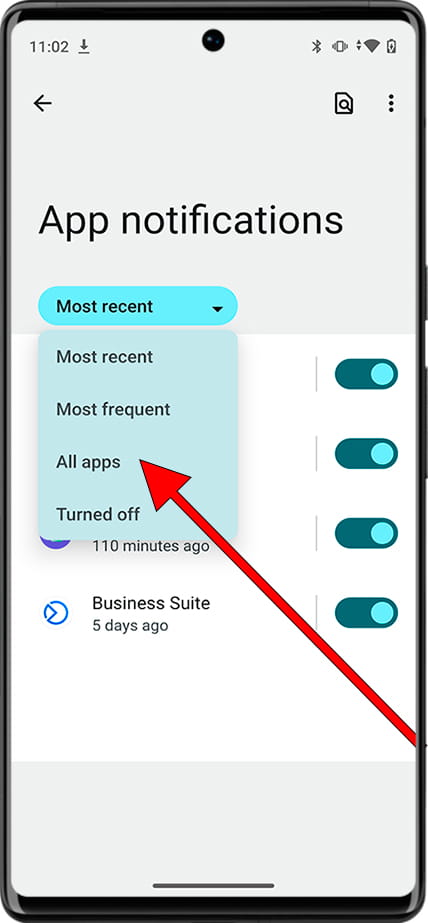
When you click on the drop-down menu, several available options will appear. Click on "All apps" to see the complete list of applications installed on this device.
6- Sixth step:
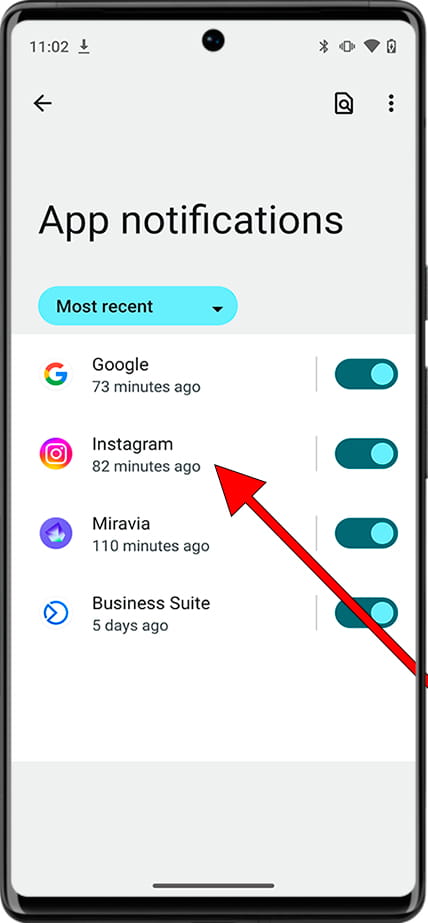
To configure the different types of notifications for an application, click on its name. If you want to deactivate all notifications for that application, click on the switch that appears to the right of the application name.
7- Seventh step:
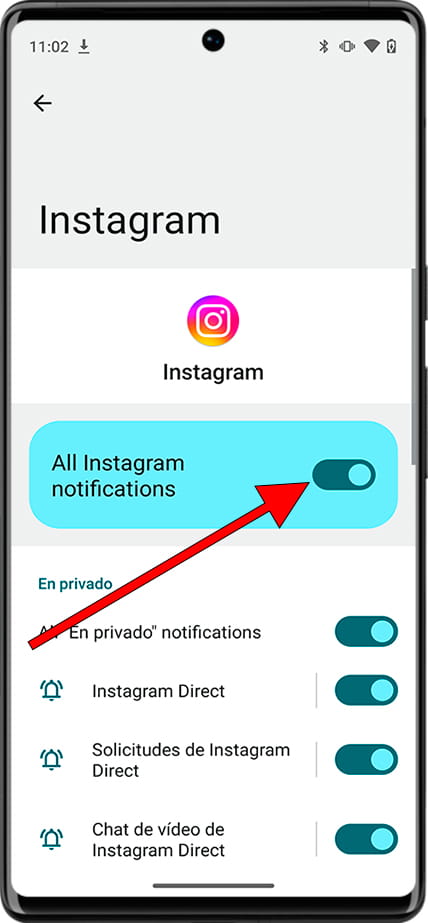
By clicking on the name of the application we will open all the notification settings of that application, from here you can also deactivate all the notifications of this application, scroll down to see the notification details of that application.
8- Eighth step:
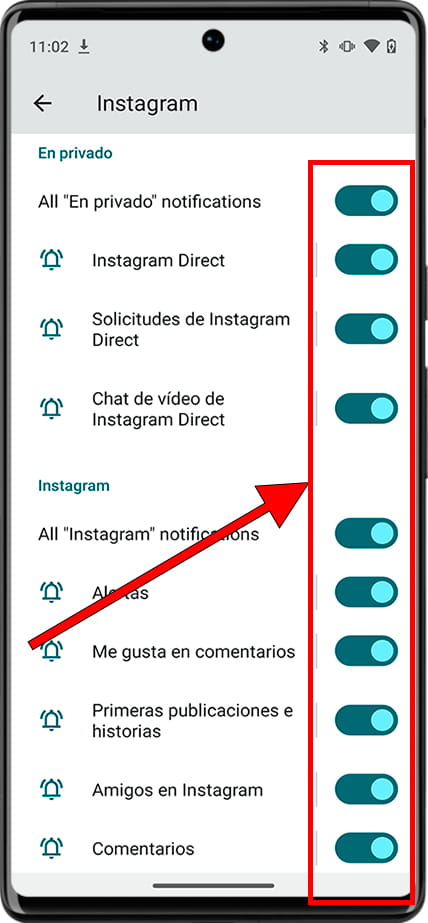
Going down through the notification settings of that app you will see the different types of notifications that are available. You can choose which notifications to keep active and which to deactivate.
For example, you can activate message or alert notifications but deactivate the rest of the notifications that are not important.
Manage notifications from the notification panel
You can also manage the notifications you receive on the HTC One A9 one by one or access the notification settings directly from the notification panel.
1- First step:
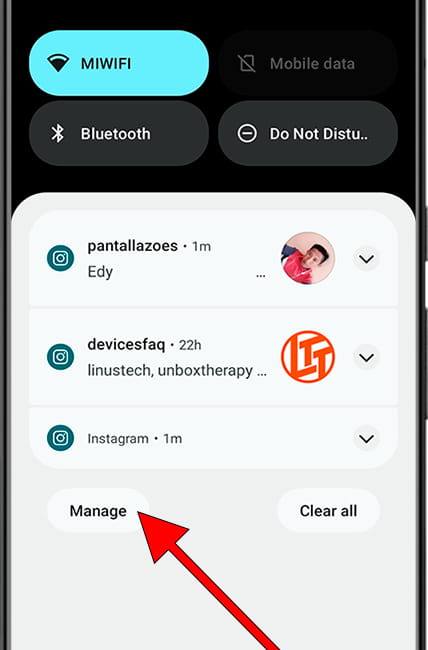
With the HTC One A9 unlocked, swipe down from the top of the screen to display shortcuts to device settings and recent notifications.

2- Second step:
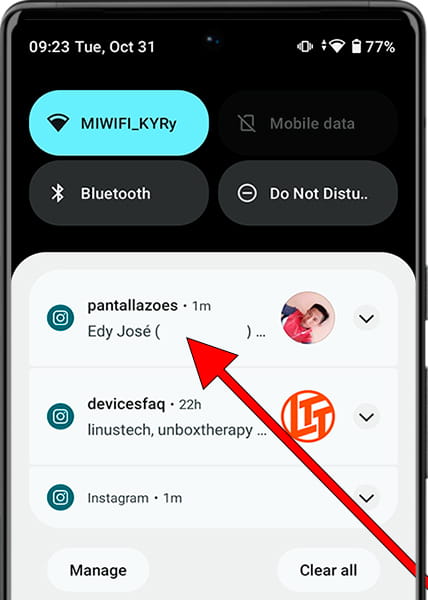
If you have any recent notifications, they will appear in this notification panel below the One A9 quick settings.
Press and hold the notification for one second to open quick notification options.
3- Third step:
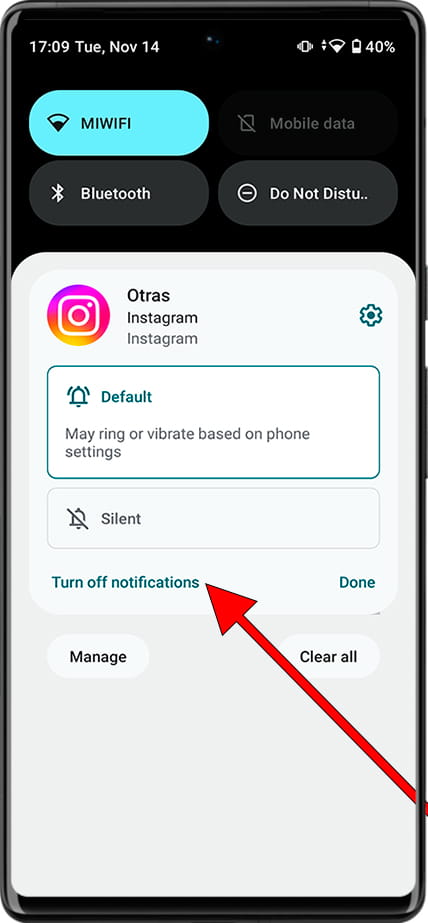
Quick options for notifications from this app will appear, you can choose to mute future notifications from this app, turn off notifications, or leave them as is.
4- Fourth step:
Below all notifications, the "Manage" and "Clear all" buttons will appear. Press "Manage" to go directly to the settings for all notifications where you can find the settings that appear in step 4 of this tutorial.
