Install Facebook on Apple iPad 3 Wi-Fi

How to install Facebook on an Apple iPad 3 Wi-Fi
If you are new to using smartphones and want to install Facebook on your Apple iPad 3 Wi-Fi and you don't know how to do it or you have problems with the installation, here we provide you with step-by-step instructions and images to install Facebook on an iPad 3 Wi-Fi.
Before starting the installation, check if you have enough storage space, the iPad 3 Wi-Fi has an internal memory of 16/32/64 GB and you will need about 70 MB free and keep in mind that Facebook will take up more space after being downloaded as it will start saving photos, videos and data.
Estimated time: 5 minutes.
1- First step:
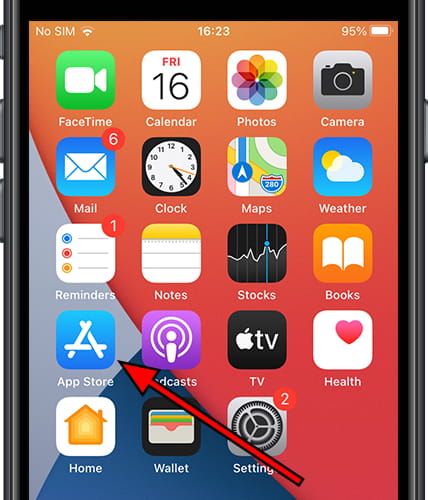
The first step to install Facebook on your iPad 3 Wi-Fi is to access the app store.
Look for the “App Store”, it should be on the home screen, if you can't find it there slide your finger to the left on the home screen to search for it on the other screens, if you still can't find it, press “Search” which appears at the bottom of the screen and use the app finder.

2- Second step:
At the bottom right of the app store you will see a magnifying glass icon, press to open the app finder.

3- Third step:
In the text box that appears below “Search” type “Facebook.”

4- Fourth step:
Select the first option, which should be “facebook” without further ado, or press "Search" on the keyboard.

5- Fifth step:
Perhaps the first application that appears is not the one you are looking for and it does not even have anything to do with Facebook, it is advertising so scroll down until you find the application you are looking for, it should be like the one that appears in the following image.

6- Sixth step:
Wait a moment for the application to download and install on your Apple iPad 3 Wi-Fi, this may take a while depending on the connection speed.

7- Seventh step:
Once it has finished installing, the “Open” button will appear; press to open the application and log in with your Facebook account.

8- Eighth step:
If after installation you want to put Facebook on the home screen of your iPad 3 Wi-Fi, look for it in the list of applications, click on the application without releasing it and drag your finger on the screen to place it in the place you prefer on the home screen.

Do you have doubts or have you not been able to install Facebook on your iPad 3 Wi-Fi? Leave your questions below and they will be resolved by the DevicesFAQ.com team and the rest of the community.


