Record sound on iPhone or iPad

Record sounds on iPhone and iPad
Last update: in the category: iPhone / iPad
In iPhone and iPad we can record sounds or our voice thanks to a built-in application called "Voice Memos".
This application can be useful to record voice notes as reminders instead of writing them, record the ambient sound or an interview or conversation with another person to listen to later.
Keep in mind that this application does not allow the recording of calls from the device itself, if during a voice note recording you make or receive a call, the sound recording will stop. This is because Apple does not natively allow call recording, there may be other specific applications to record calls in the App Store but we cannot recommend them or give instructions on how to use them. These other applications may contain advertising or purchases within the app in order to finance themselves.
Estimated time: 5 minutes.
Step 1:
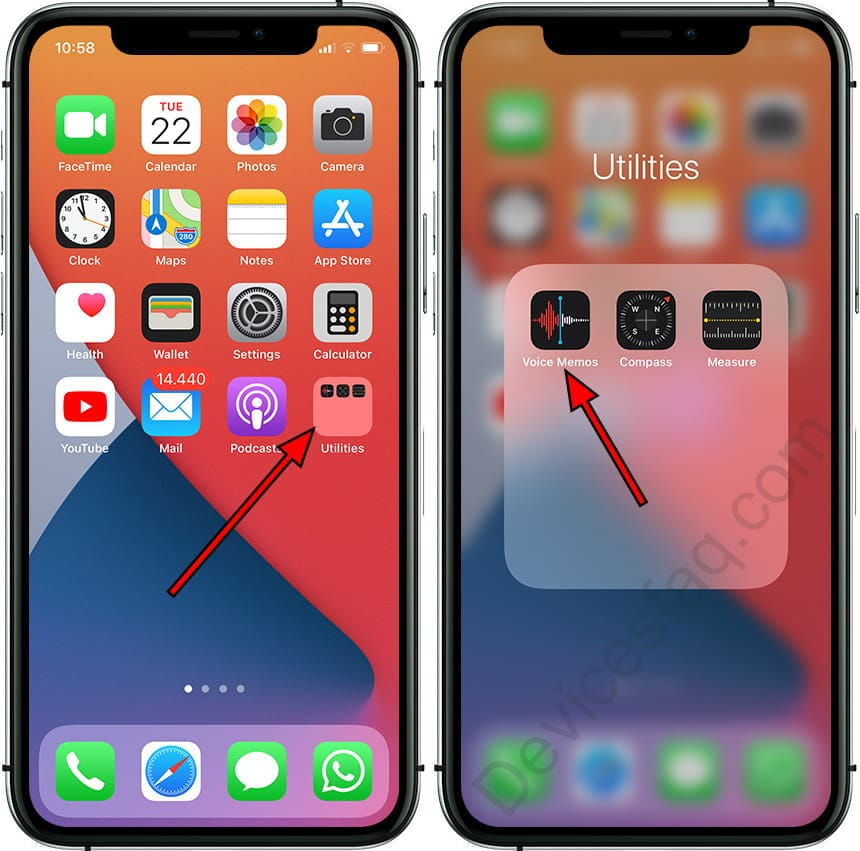
We look for the “Voice Notes” application on the home screen of our iPhone or iPad, on iPhone it is usually stored in the “Utilities” folder. Click on utilities to open this folder and open the "Voice Memos" application.

Step 2:
The first time we open the application, a welcome screen will appear indicating the functionalities of the application. We click Continue.

Step 3:
A window will appear asking for permission to access the location of the iPhone or iPad. This location will be used to name the voice memos with the location.
If you are not interested in using this functionality, click on "Do not allow".

Step 4:
If there are already stored recordings they will be listed. Press the red button when you want to start recording a new voice memo. You can lock the device and it will continue to record the sound.

Step 5:
From the iPhone lock screen you can pause the recording, press "ok" to stop it. If you don't have it blocked, press the red square button again to stop.
During audio recording, an orange dot will appear at the top of the screen indicating that the sound from the microphone is being recorded, this is useful to know if you have mistakenly left the application recording or to know if someone else has activated the recording of sound on your iPhone or iPad.

Step 6:
All recordings will appear on the app's home screen. From here you can delete the recording by pressing the trash icon or play it.

Step 7:
By clicking on the three horizontal points to the left of the recording, you can edit the recording, copy it, share it, save it in the files, mark it as a favorite or duplicate it.


