Change the language on Noa F10 Pro
Change language to Noa F10 Pro
If your Noa F10 Pro is set to a language other than the one you typically use, whether it be due to purchasing it imported, second-hand, or accidentally changing the language settings, you can easily change it back by following these steps.
Changing the language of your F10 Pro back to English from any other language is very simple, if you do not understand the text that appears on the screen you can follow these instructions through the images since the menus are in the same position regardless of the language installed on the Noa F10 Pro.
Please note that changing the language on your Noa may also change the language of certain apps and system features. Additionally, changing the language may also change the keyboard layout and formatting of dates and numbers.
Table of Contents:
Estimated time: 5 minutes.
1- First step:
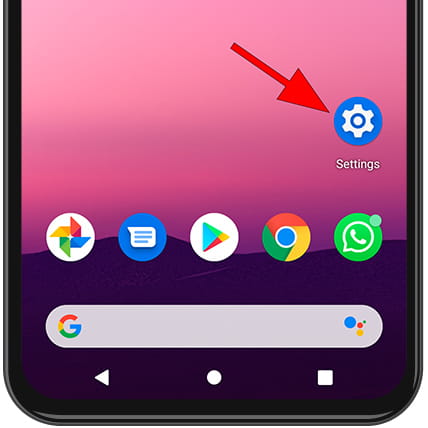
First, go to the settings of the Noa F10 Pro, it is the icon of the cogwheel, it must be on the home screen or in the menu of the phone, you can access the main menu usually by dragging your finger from the bottom to the top of the screen.
2- Second step:
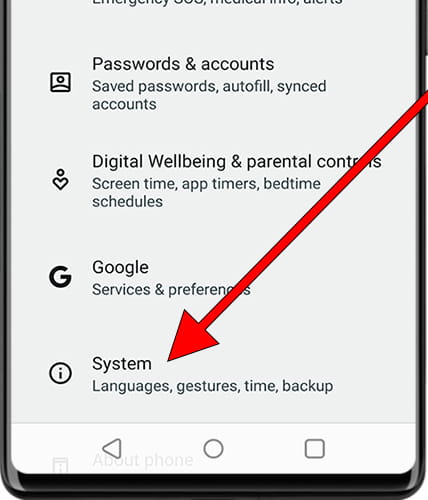
Look for the System section, usually the icon of the exclamation mark symbol that is in the lower part of the screen.
3- Third step:
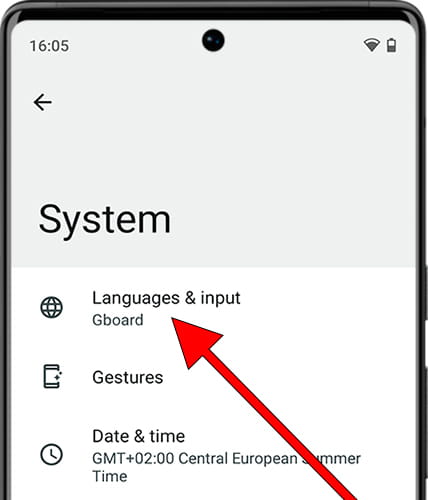
Click on “Languages & input” it is the world globe icon. From this section you can change the language of the texts displayed on the Noa F10 Pro and also the keyboard language.
4- Fourth step:
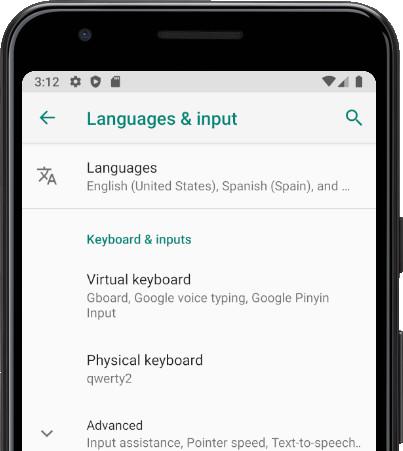
Click again on “Languages”, this is the first option at the top of the Noa F10 Pro, screen, usually with Chinese characters.
5- Fifth step:
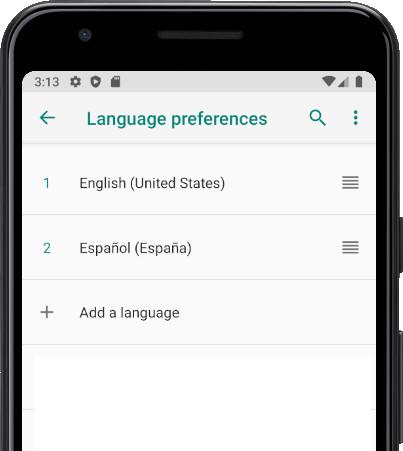
Press the + “Add a language” button to add a new language to the Noa, a list of suggested languages will appear and below the rest of the languages.
6- Sixth step:
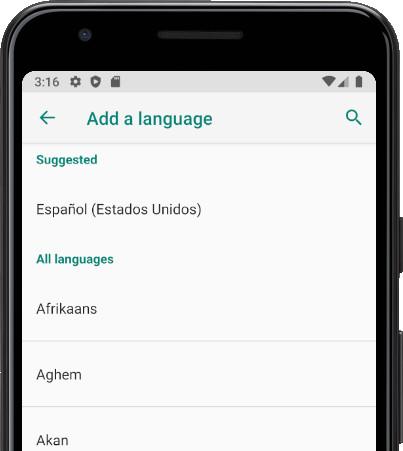
Search for the language in the list or use the magnifying glass icon in the upper right to use the language search to find the language to which you want to change your Noa F10 Pro and select it.
7- Seventh step:
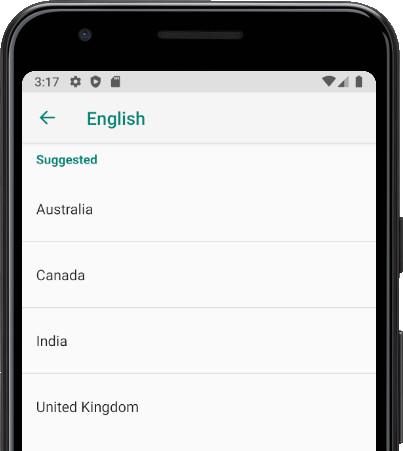
Once you have selected the language you want to install on your Noa F10 Pro a list of options will appear to choose the region for that language, select the appropriate region. You must select the appropriate region to install the dictionary that corresponds to your country or geographical area.
8- Eighth step:
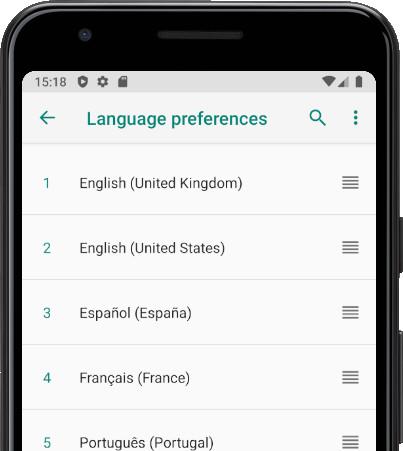
Using the vertical lines on the right click and drag the language to the first position, this will be the main language of the Noa F10 Pro.
Video instructions
Once the new language has been added to your Noa F10 Pro you can delete the previous language that you will not use by following instructions in the link below: Delete language Noa F10 Pro


